There so much left to do and at the same time so few discrete “features” for blog posts. I am still trying to do it “one feature per post” to justify every feature, but it’s getting harder and harder. Most “features” aren’t actually features, but more like modifying, expanding and tinkering with existing ones.
Anyway, I guess I’ll do the options menu/screen, since it has to get done at some point. Someone told me this would make the game feel more complete (but I am pretty sure they are making things up). I’ll also add some of the basic options for each. My current options are basically what my mobile game had (essentially, nothing without the microtransaction restore button):
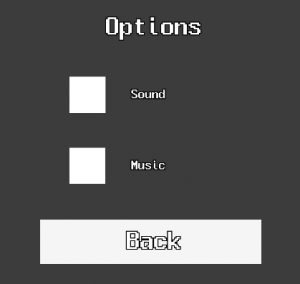
First step is to break up the options into categories. I have enough of these to warrant this — just the control mapping would take a whole screen. So I made tabs for this and converted my options panel to be the one with tabs, and no actual “optioning” until a tab is selected:

Instead, I can make additional option subpanels, like the audio subpanel, which has the two toggles that the options previously had:

Of course, I need to track which tab is active and switch accordingly to the right subpanel:
![]()
At this point, I am about to add more options, but I don’t have a proper pipeline for this. My audio options are stored in music and sound systems, but that’s not really in the spirit of “options”, so I am adding a new system for this:
![]()
I can wire it to use my existing save system. But I also have to adjust the saving to properly trigger the saving of the options when they get changed:
![]()
In fact, there’s a lot of finicky things with saves. For example, I need to invalidate earlier save completely due to invalid data (though this will only happen in development, in production the save version remains the same and individual systems upgrade theirs as needed):
![]()
Let’s also add sound and music volume sliders that I had no real need for for mobile (and I couldn’t be asked to do this):

So the first big new important option to add is the screen resolution:

And the screen mode:

And have these read from defaults, applied when changed, and saved for future runs, then restored:
![]()
Well, all of that took way longer than it took to describe the three screenshots. I’ve never done proper PC screen resolution stuff before, so this was something properly new. There’s a lot of gotchas about switching resolutions and such. But nothing too bad, given how much Unity does for you.
The other options screen is gameplay. For now, I will just wire my screen shake mode (that I added ages ago) as an option:

Finally, controls. I am using Rewired plugin/asset for this, because I don’t really want to manually deal with lots of things that it can do for me, including all the joystick support and UI key mapping, etc. It’s a worthwhile investment, I hope.
I won’t be going over the steps I took to implement it, as that’s basically rehashing the Rewired documentation and set up guides. Long story short, I integrated everything into the project and now my controls are “dynamic” from Rewired (this is always-on debug control list):

(The benefit here is that I can call controls by “name”, like “fire”, instead of hard-coding some button or storing some variable with button code. Rewired takes care of all of that with multiple layers of player to mapping scheme to actual keyboard/mouse/joystick map to actions that are the ones I use in-game.)
The next step is to integrate their control remapping into my UI, which they helpfully provide as a self-contained UI “prefab”. It’s somewhat trickier than that with lots of different incompatible things and lots of tweaks and theming I need to do, but in the end I got it on my control screen more or less how I want it (disregarding my placeholder sprites):

Phew! That actually took some effort in terms of “I have no idea how to do this, so now I need to do research and experimentation” versus my usual “yeah, this is just more coding”. Rewired comes with its own canvas for this, which is… interesting. I am also far from getting it working properly. I will do a whole another pass with joystick enabled later, which will involve a whole lot of changes and tweaks.
As a final quality of life feature, I added a reset button to reset all the options to default, including keybindings and all:

Well, that about does it for an options framework and primary UI minus sprites and proper layout. Tedious but necessary.